Hello, Intune Enthusiasts!
Are you prepared to elevate your corporate desktop experience from mundane to magnificent? Prepare yourself for an exciting journey of customization as we delve into the world of personalized desktop branding. Say farewell to generic backgrounds and embrace a desktop environment that embodies the essence of your company. The best part? It’s simpler than you might imagine, thanks to the wonders of Microsoft Intune.
Imagine gazing at your Windows 365 Cloud PC or Windows 10/11 device and craving a touch of uniqueness. Well, get ready to turn that longing into reality! With Intune, you have the ability to effortlessly change your desktop wallpaper, infusing it with your company’s distinct branding. But hold on tight, because we’re about to take it to the next level.
What if I told you that with just a single PowerShell script, you could revolutionize your desktop experience? Yes, you read that correctly – no more tedious manual uploads or intricate configurations. Our lightweight package does it all, from retrieving images from your blob storage to dynamically applying wallpapers with automatic accent colors based on the background. It’s like magic, only better!
Are you ready to dive deep into the realm of desktop customization? Let’s embark on this thrilling journey together. Unleash your creativity and watch your desktop shine with Intune!
With a stroke of brilliance, this script proudly showcases your company’s branding wallpapers on the Background Setting pages. Bid farewell to mundane Microsoft default images – now your brand’s vibrant identity will radiate as the default Desktop Wallpaper for all end users on Background Setting pages.

Let’s dive in:
Step 1: Logging in to Microsoft Intune Admin Center First and foremost, head over to your Microsoft Intune admin center. This is where the magic begins! Once logged in, you’re all set to transform those desktops.
Step 2: Adding a New Script for Windows 10 and Later Navigate to “Devices-Scripts and Remediation,” then click on “Add” and select “Windows 10 and Later” from the dropdown menu. Here, we’ll create our script to change the desktop wallpaper.

Step 3: Naming and Describing Your Script Give your script an apt name like “MSIntune Wallpaper” and provide a concise yet informative description such as “Company Branding wallpaper script to change Desktop Wallpaper with automatic Accent Color and other Settings.” Hit “Next” to proceed.

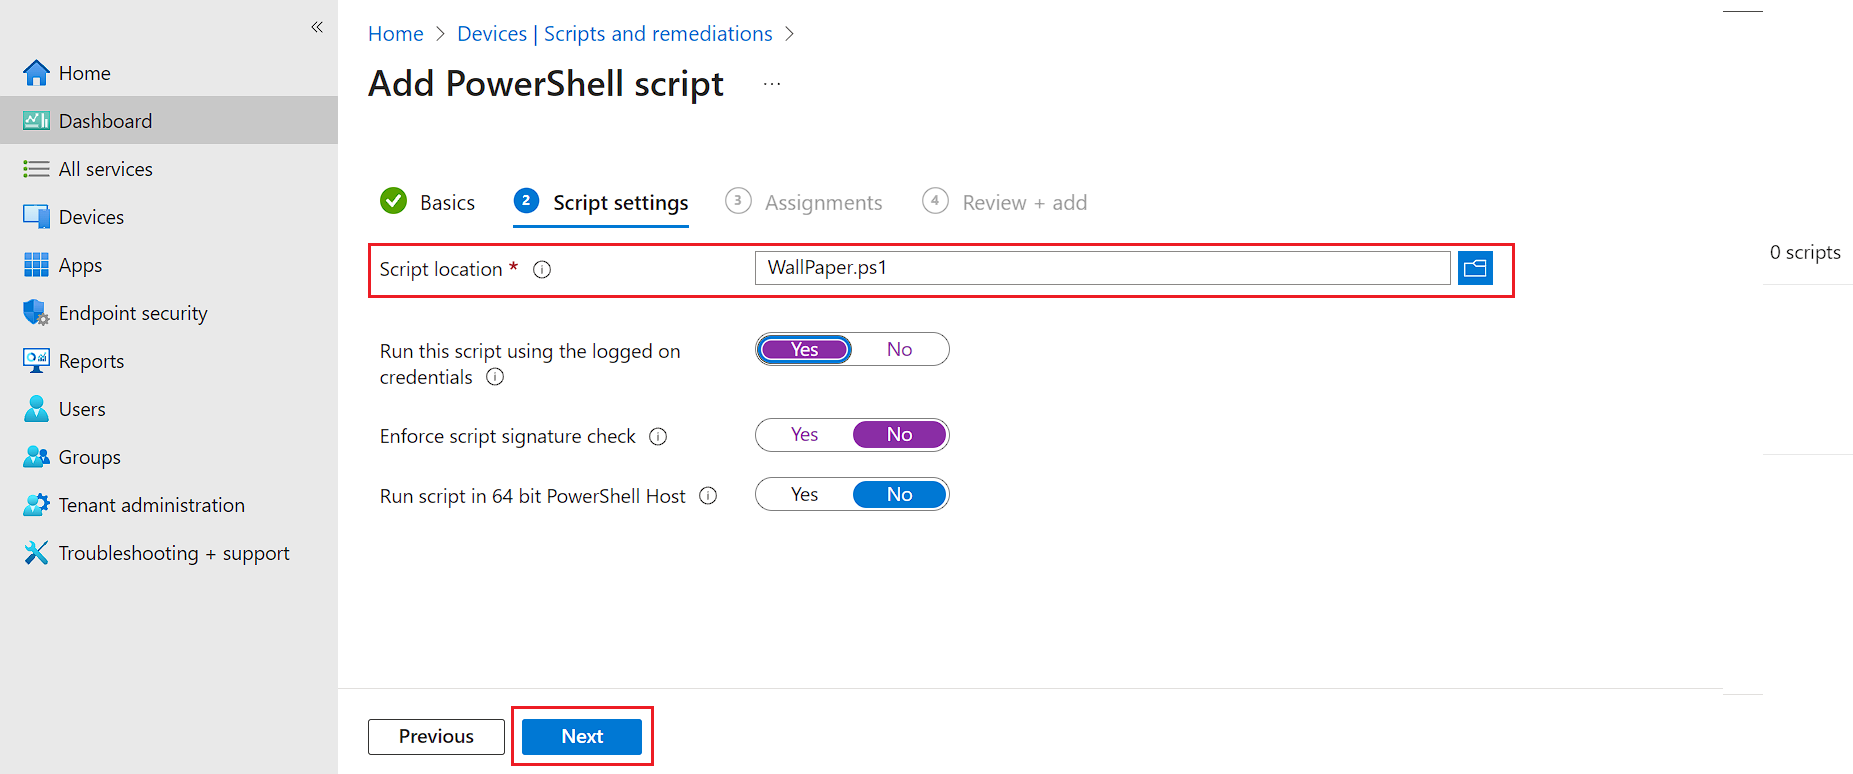
Step 4: Selecting the Wallpaper Script Choose the script “Wallpaper.Ps1” from the available options. This script will manage the task of changing the desktop wallpaper. Configure any additional settings as necessary, then click “Next” to proceed. You can find the script here
Step 5: Assigning the Script Now, it’s time to assign the script to a device group containing your Windows 365 Cloud PC or Windows 10/11 devices. This ensures that the changes will be applied to the relevant devices within your organization.
Step 6: Enjoying the Results Once the script is applied, allow some time for it to take effect. Upon logging off and logging in to your Windows 365 Cloud PC or Windows 10/11 device, you’ll be greeted with your company’s branding proudly displayed on the desktop wallpaper. It’s that simple!
And there you have it – a quick and straightforward method to infuse a personal touch into your company’s devices using Microsoft Intune. So, go ahead, unleash your creativity, and let your company’s identity shine through every desktop screen!
Views: 75