
Let’s face it—managing device onboarding can be a headache, both for IT admins and end users. If you’ve ever dealt with the back-and-forth of collecting device serial numbers via PowerShell commands, you know exactly what I’m talking about. End users running scripts, sending outputs to IT, and admins manually uploading data—it’s a clunky, time-consuming process that no one enjoys.
But what if I told you there’s a better way? A way to simplify the entire process, minimize end-user effort, and make life easier for your IT team? That’s exactly what we’re going to explore today. By leveraging Microsoft Intune’s Autopilot Device Preparation and Corporate Device Identifiers, you can streamline device onboarding and deliver a seamless experience for everyone involved.
The Problem: Clunky PowerShell Workflows
Here’s the traditional process many organizations still follow:
- End User Runs PowerShell Commands:
- The user opens Command Prompt, runs a script like Get-WindowsAutopilotInfo.ps1, Get-WindowsAutoPilotInfo -OutputFile C:\Users\Public\AutopilotHash.csv, bypassing Executionpolicy and copies the output.
- End User Sends Data to IT:
- The user emails the output or shares it via another channel.
- IT Admin Manually Uploads Data:
- The admin takes the data, formats it into a CSV, and uploads it to Intune.
This process is not only tedious but also prone to errors. End users might run the wrong command, send incomplete data, or forget to follow up altogether. IT admins, on the other hand, are stuck playing data-entry clerk instead of focusing on more strategic tasks.
So, let’s dive in! I’ll break this down into simple, actionable steps, and I’ll share some tips from my own experience to help you avoid common pitfalls.
Step 1: Create Security Groups
Let’s start by organizing your devices and users, as this will lay the groundwork for your Autopilot setup.
- Create Two Dedicated Groups in Intune Portal:
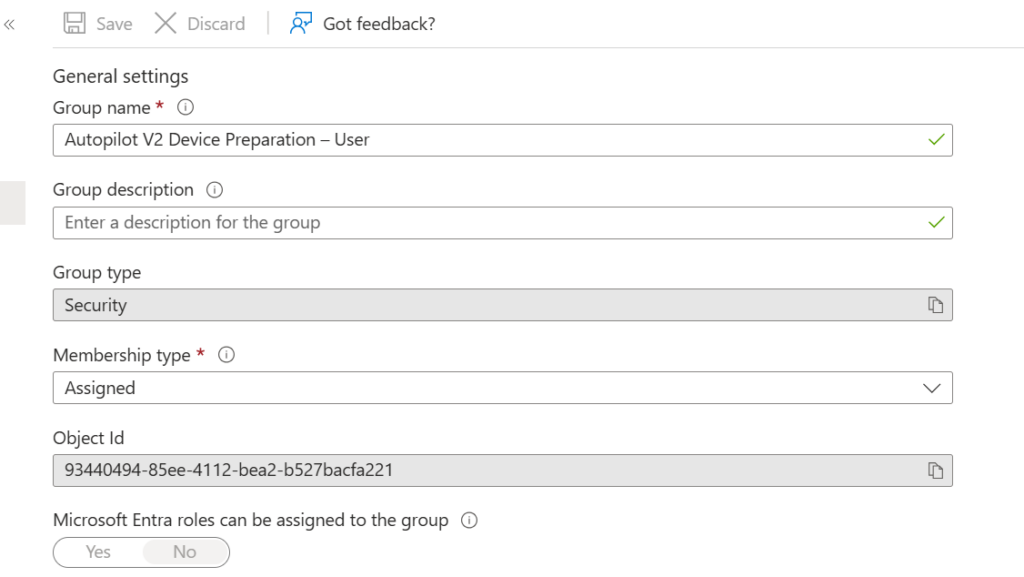
- Autopilot V2 Device Preparation – User
- Membership: Assigned
- Purpose: This group will include all users who will perform the Autopilot setup.
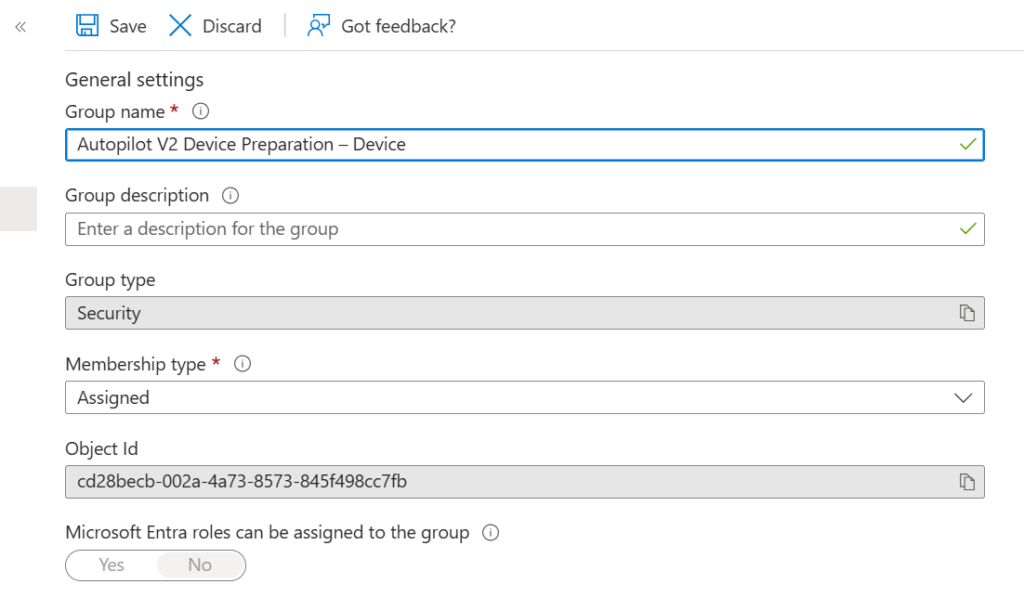
- Autopilot V2 Device Preparation – Device
- Membership: Assigned
- Owner: Set this to the Intune provisioning enterprise app (ID:
f1346770-5b25-470b-88bd-d5744ab7952c). - Purpose: This group will house the devices that will undergo pre-provisioning.
- Autopilot V2 Device Preparation – User
Pro Tip: Naming conventions matter! Keep your group names clear and consistent. Trust me, it’ll save you a headache later when you’re managing hundreds of groups.
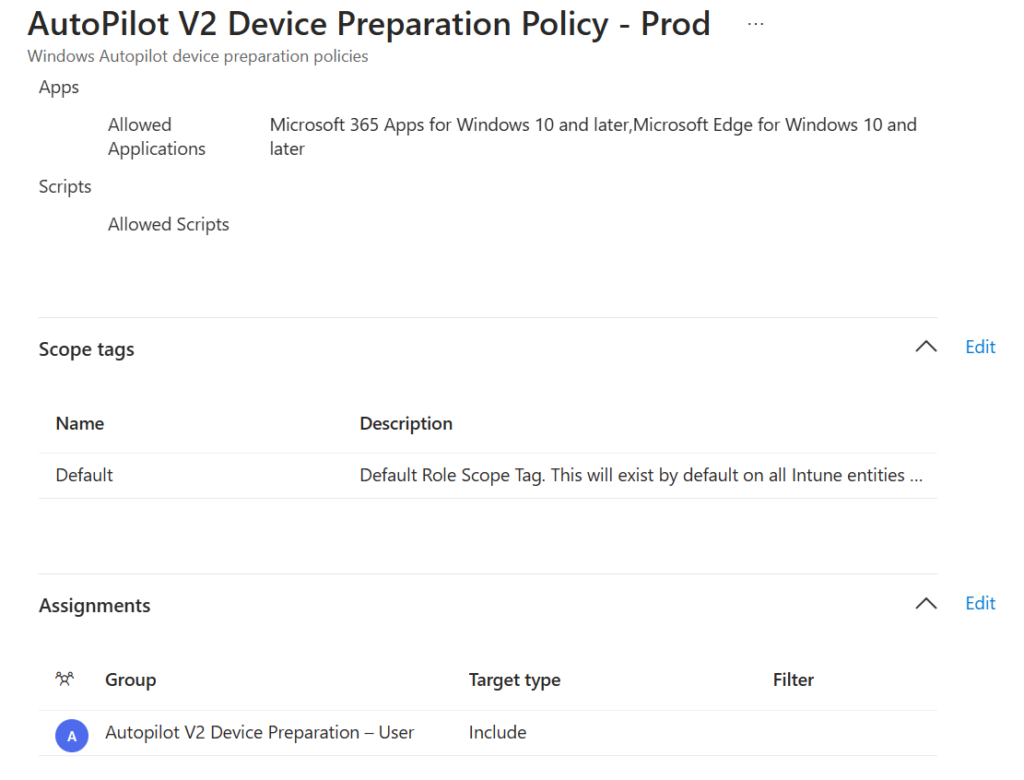
Step 2: Configure the Device Preparation Policy
Now that your groups are in place, it’s time to configure the policy that will govern how devices are pre-configured..
- Access the Policy Settings in Intune Portal:
- Navigate to Intune > Devices > Enrolment > Device Preparation Policies.
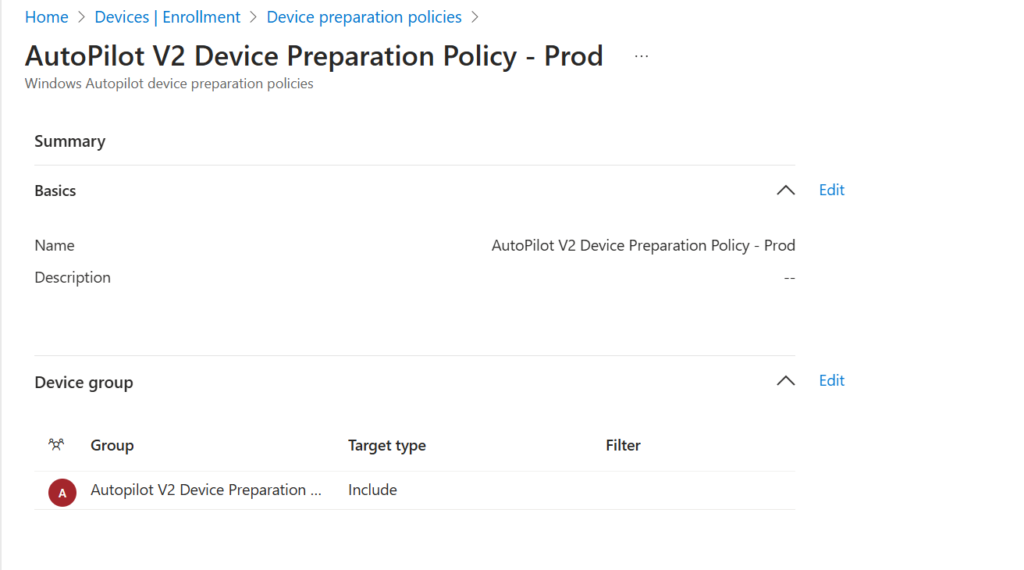
- Create a New Policy:
- Policy Name: Something like “AutoPilot V2 Device Preparation Policy – Prod.”
- Device Group: Select the Autopilot V2 Device Preparation – Device group you created earlier.
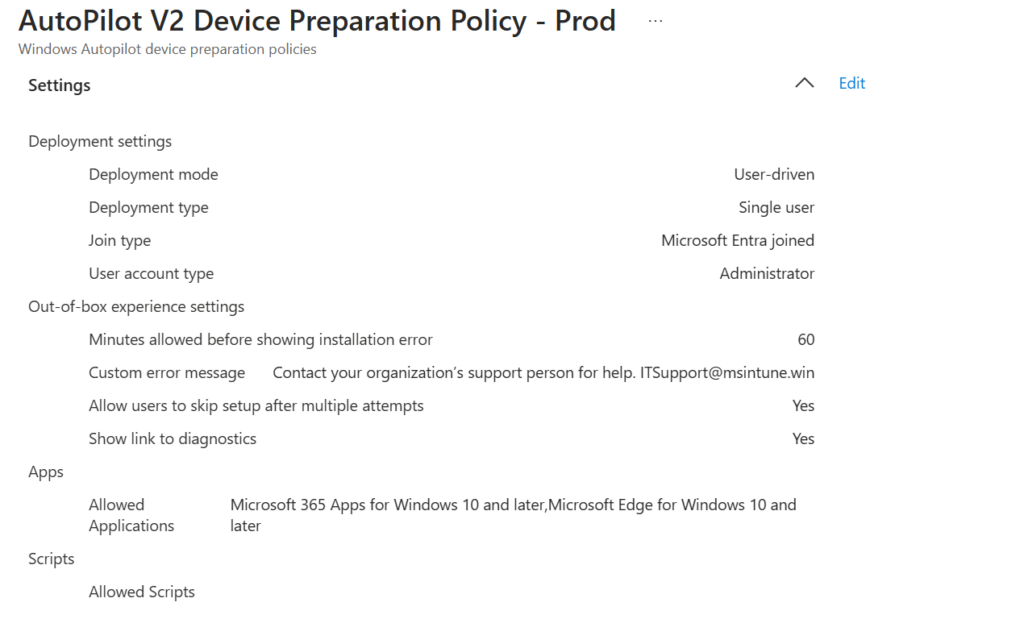
- Configure the Policy:
- Join Type: Choose Entra Joined Only (note: hybrid join isn’t available here).
- User Setup: Disable the option to allow users to skip setup after multiple attempts. This ensures everyone completes the setup process.
- Apps: Add essential apps like Company Portal, Windows App, Microsoft Edge and Microsoft 365 Apps. Make sure each app is assigned to the Autopilot V2 Device Preparation – Device group.
- Scripts: Attach any necessary scripts, such as a bloatware removal script (more on this later).
- Tags: Leave this blank unless you have a specific use case.
- Assignments:
- Assign the policy to the Autopilot V2 Device Preparation – User group.
- Review:
- Double-check everything before saving. A small mistake here can lead to big headaches down the line.
- Double-check everything before saving. A small mistake here can lead to big headaches down the line.
Pro Tip: Test this policy on a small group of devices first. It’s easier to troubleshoot issues with a handful of devices than with an entire fleet.
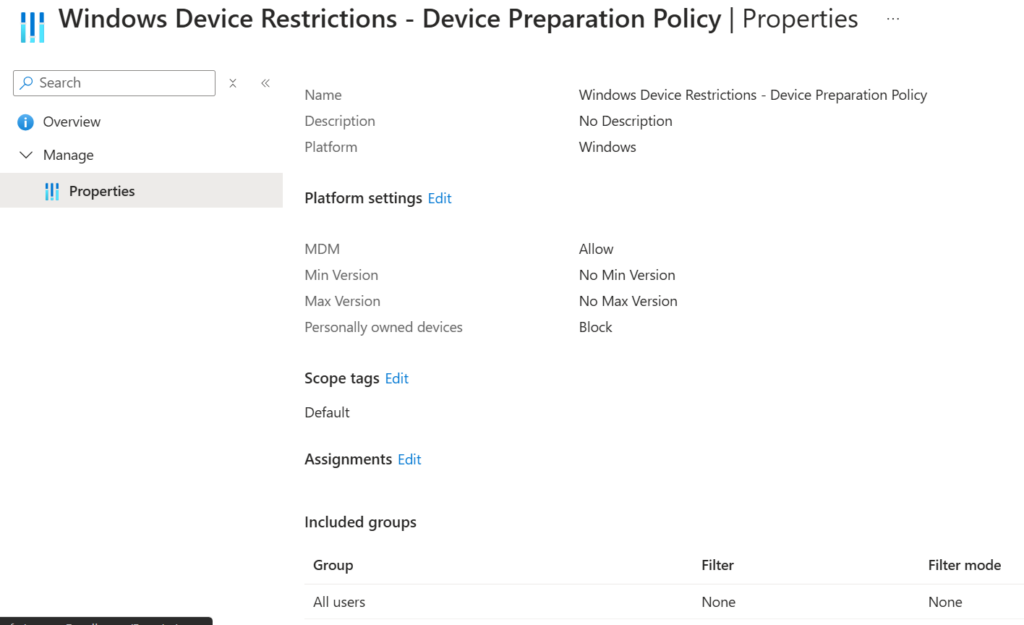
Step 3: Set Device Platform Restrictions
You don’t want personal devices sneaking into your corporate environment. Platform restrictions are your first line of defense.
- Access Platform Restrictions:
- Go to Intune > Devices > Enrolment > Device Platform Restrictions.
- Create a New Restriction:
- Restriction Name: Something like “Windows Device Restrictions.”
- Assignments: Apply the restriction to All Users to block personal devices from enrolling.
Pro Tip: If you have a BYOD (Bring Your Own Device) policy, you’ll need to adjust this restriction accordingly. But for most corporate environments, this setup works like a charm.
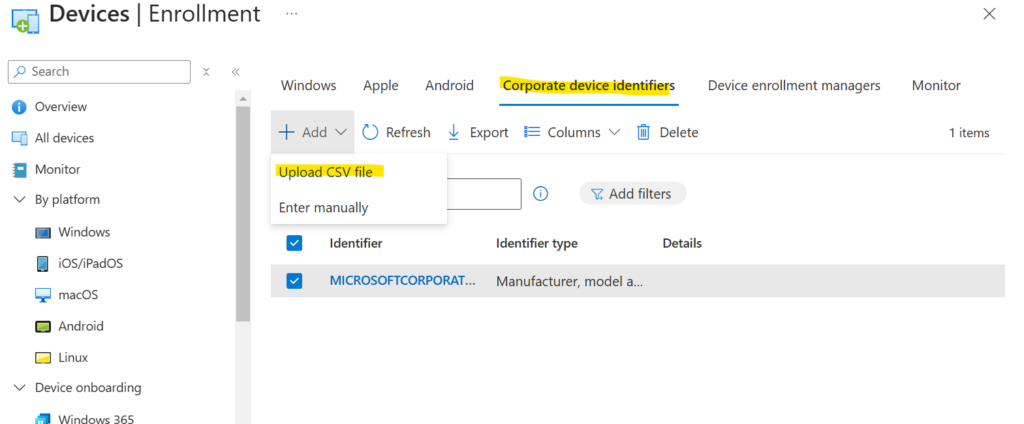
Step 4: Define Corporate Device Identifiers
This step is all about making sure Intune knows which devices are corporate-owned. It’s like giving your devices a corporate ID badge.
- Access Corporate Identifiers:
- Navigate to Intune > Devices > Enrolment > Corporate Device Identifiers.
- Add Identifiers:
- Manually: Enter identifiers like IMEI or Serial Number (more common for mobile devices).
- Upload CSV: For Windows devices, select “Manufacturer, model, and serial number.” This CSV file confirms that the device is corporate-owned.
- Create a CSV File:
- Open Command Prompt and run:
wmic csproduct get vendor, name, identifyingnumber - Copy the output into a text editor (like Notepad) in this format:
Vendor,Name,IdentifyingNumber - Save the file as
AutoPilotV2.csv. - Upload the CSV file to Add Identifiers > Upload CSV.
- Open Command Prompt and run:
Pro Tip: Keep your CSV files organized and backed up. You’ll thank yourself later when you need to reference or update them.
Final Thoughts
Setting up Autopilot Device Preparation might seem like a lot of work at first, but once it’s configured, it can significantly reduce your device onboarding time. With Microsoft Intune’s capabilities, you can streamline the entire process, making it more efficient and hassle-free for both IT teams and end users.
By automating tasks that were previously manual—like data entry and device provisioning—you can cut onboarding time in half or even more. For organizations still relying on end users to run PowerShell commands and send data to IT, it’s time to rethink your approach. Let your IT team take the lead in managing the process, which will result in faster, smoother, and more efficient device setups.
One healthcare provider, for example, was struggling with onboarding devices for their remote workforce. The process was manual and error-prone, leading to frustration for both the IT team and end users. After implementing Autopilot, they were able to:
- Reduce onboarding time by 60%
- Eliminate data errors
- Free up their IT team to focus on more strategic work
Best of all, their end users didn’t have to lift a finger. The key to success here is testing. Always test the setup with a small group of devices before rolling it out to the entire organization. Every company is unique, and adjusting your approach as you go will help you achieve the best results.
Have questions or need help getting started? Feel free to reach out—I’m always here to help!
Happy automating!
Views: 518